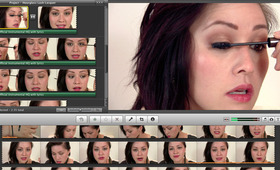
Once you've selected the clips for your tutorial, you can make the video look stylized and presentable. Even though iMovie is a fairly simple program, learning how to edit tutorials can be a little bit confusing at first. Here are some tips for making a well-edited iMovie video.

Hover over the selected clip and click on the drop-down menu at the bottom left to see the basic adjusmetns: Precision Editor, Clip Trimmer, Clip Adjustments, Video Adjustments, Audio Adjustments and Cropping & Rotation. We're going to look at sound first so go to Audio Adjustments.

This is where you can adjust the volume. Go higher than 100% if you talk too softly; lower if you're a bit too loud. Fading the sound in and out can help transition frames so they don't sound choppy. We recommend fading in and out more than the standard of 0.5 seconds(try 2.0 seconds). To reduce your background noise, check the box by the third arrow.

If your camera has some shake, select Clip Adjustments and check the box next to Stabilization. This smoothes out the unsteady movements you see within a frame.

On the right-hand side of iMovie, you'll see a set of icons for video enhancements such as text, audio, and pictures. We're going to explain transitions. Transitions make for a smoother video and break up a subject into clearly defined segments. Simply select a transition (we recommend Cross Dissolve, Cross Blur, Cross Zoom, Fade to Black and Fade to White as these look the most professional) and drag and drop between two frames to apply it. One advantage to transitions is that they slightly cut down on video time (the more transitions, the shorter the video will be).
Beautylish Tip: Play around with iMovie to get acquainted with the program. You'll be editing like a pro in no time!