

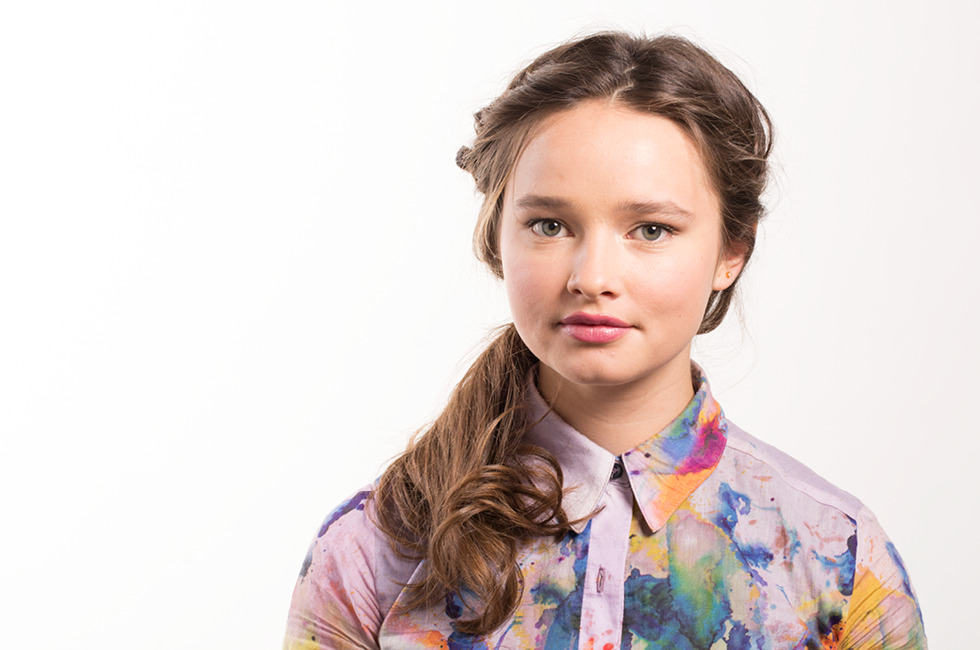
Braids will never go out of style. But nowadays, it can feel like you’re almost expected to do something more than a basic braid, doesn’t it? It’s hard to keep up with all of the intricate variations out there. The good news is, you can branch out without getting too overly complicated.
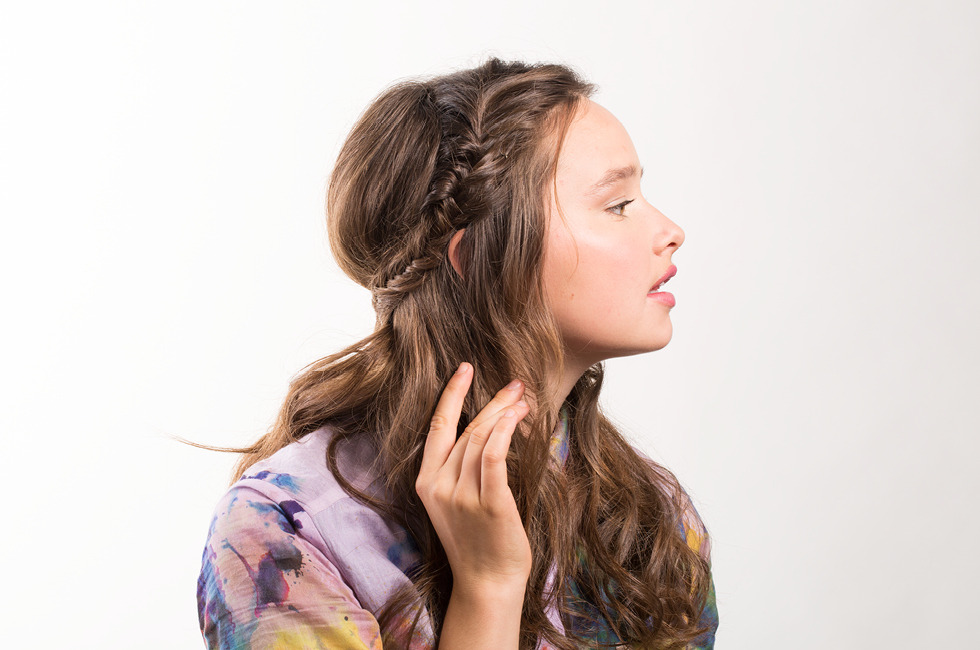
Enter celebrity hairstylist Creighton Bowman, who showed us how to do this romantic half-up fishtail style. It was a lot easier to do than we anticipated! Maybe that’s because the style welcomes, and actually looks better, with some hairs out of place. “What makes it so cool, is the inability to do it perfectly,” says Bowman. So it’s great for novice braiders! If this is your first time trying a fishtail, we recommend using slightly larger strands of hair. If you’re experienced, the skinnier the sections you braid, the more intricate (and difficult) the braid will be. Whatever level you’re at, here are the steps. Give it a try!
You will need
2-3 hair elastics
3 bobby pins
comb
hairspray
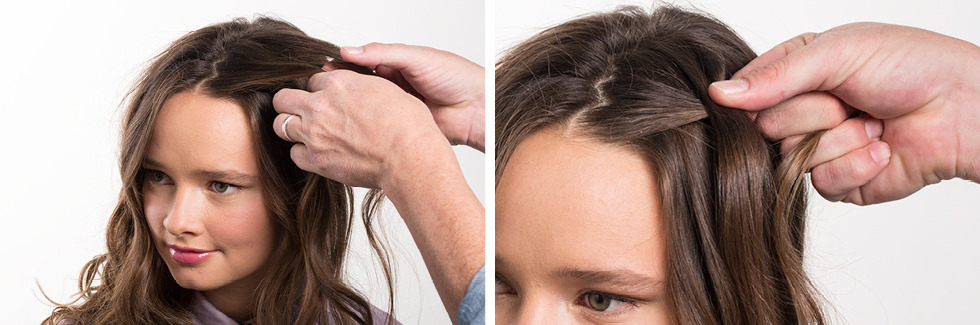
1: To start, leave your natural part and grab a small section—the hair closest to the face—to create a small braid on each sides (see photo). The rest of your hair will stay loose; if you want, you can clip it out of the way as you work on your braids.

2: Pick which side you want to fishtail first, and divide that section of hair in half. Pull a thin strand from one portion (grabbing a piece from underneath is best, so that it wraps around fully) and bring it over the top of the other half section—let the strand of hair merge with the rest of the locks. As you work, try to keep each strand of hair roughly the same thickness throughout to avoid an uneven braid. (For more detail instrux on creating a fishtail braid, see this tutorial, too.)
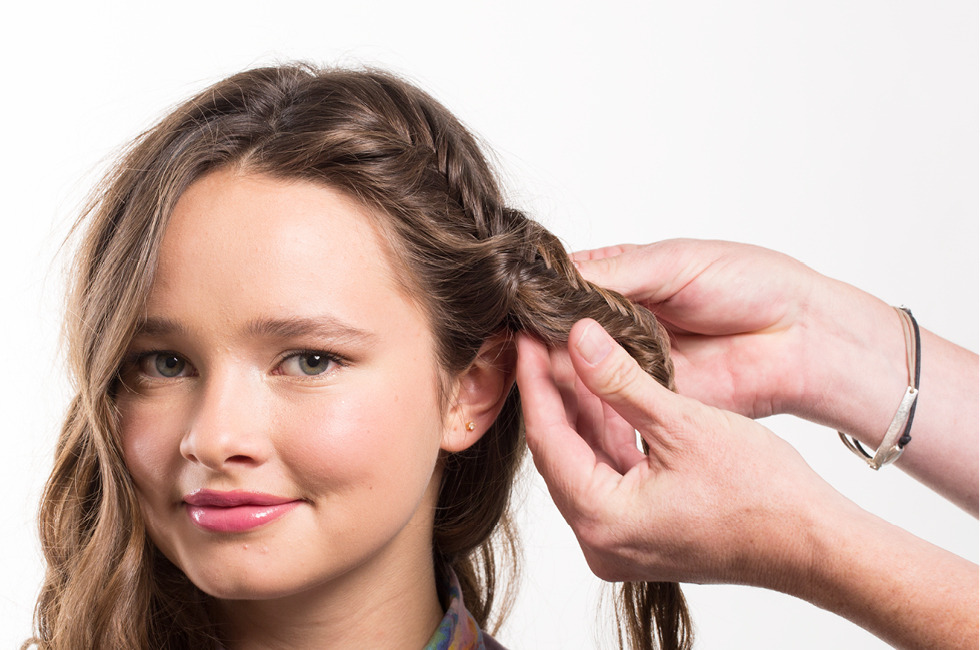
3: Repeat step two, alternating between sections of hair until the first side is fishtailed halfway down.
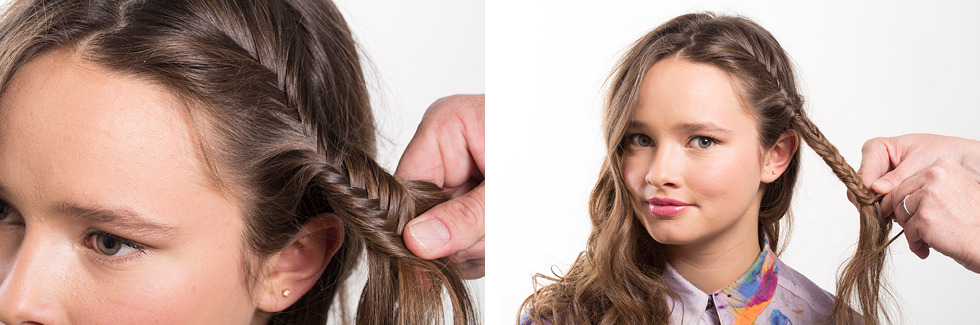
4: Using your fingers, rub the end of the braid a bit to create a messy “knot,” which keeps the fishtail from unraveling. If you prefer, you can also add an elastic.
5: Repeat steps 2, 3, and 4 on the other side of your hair.
6: Next, you want to backcomb at the crown of your head to add extra volume.
7: Use a comb to smooth the top of the hair down. Remember though, it doesn’t have to be perfect—it’s supposed to be a textured style and it’s meant to look a little messy. It’s more romantic that way!
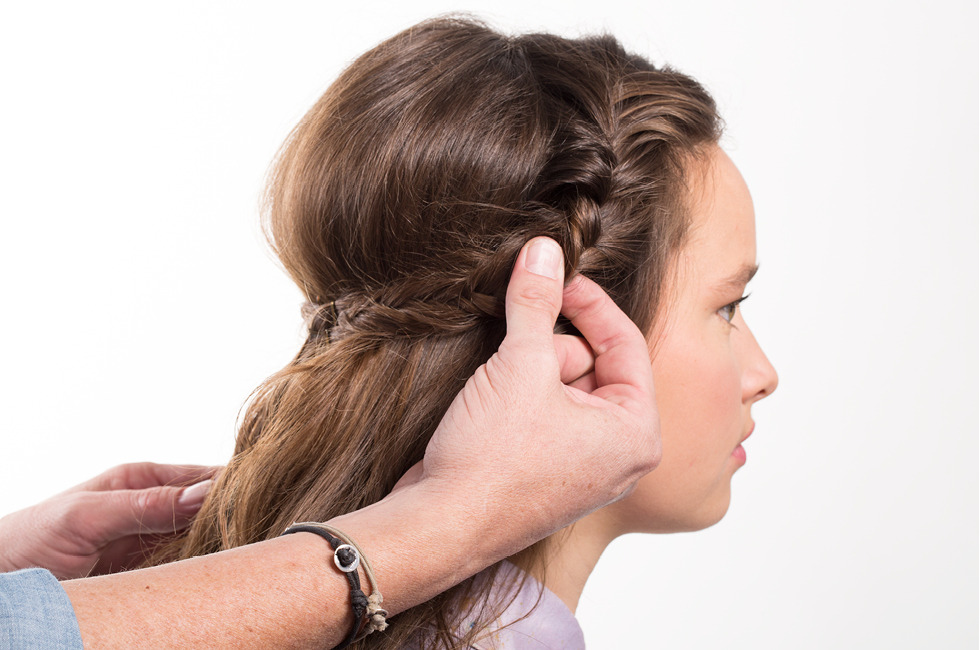
8: Grab the ends of each braid and pull each strand towards the center back of the hair. Secure them at the curve of your head, by criss crossing two bobby pins in opposite directions. Add one more through the center of the pins to firmly hold the ends in place.
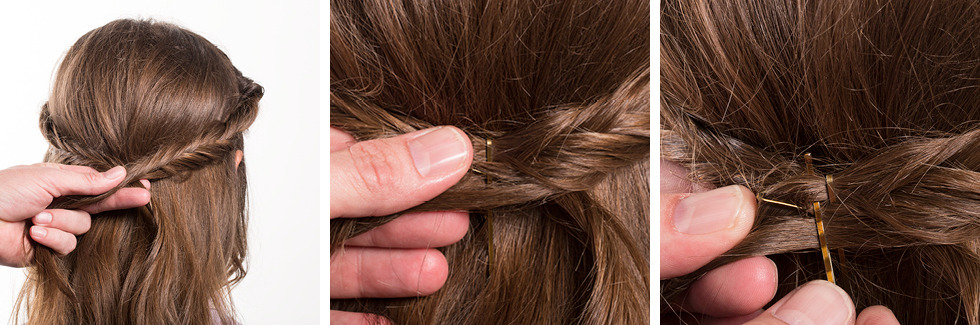
9: If you want to give the braids a more loose and messy effect, lightly pull them outwards. This helps create more volume for finer hair, too.
10: Set everything with a little bit of hairspray.
At this point, you’re technically done. But, if you’re feeling adventurous, try these bonus steps to take your braid to the next level. We swear, it’s easy and gives the ’do a whole new look!
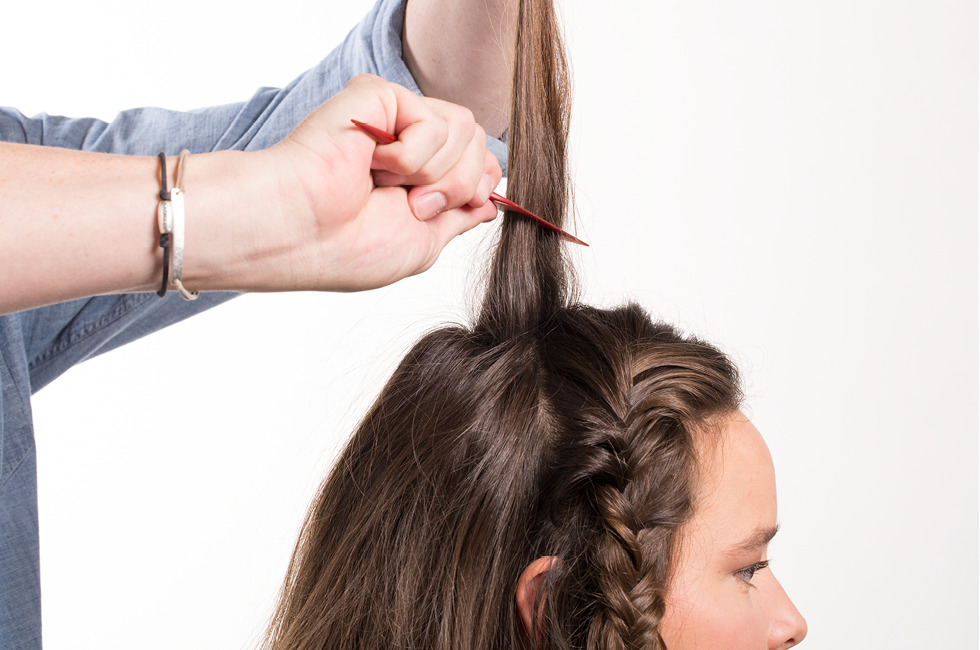
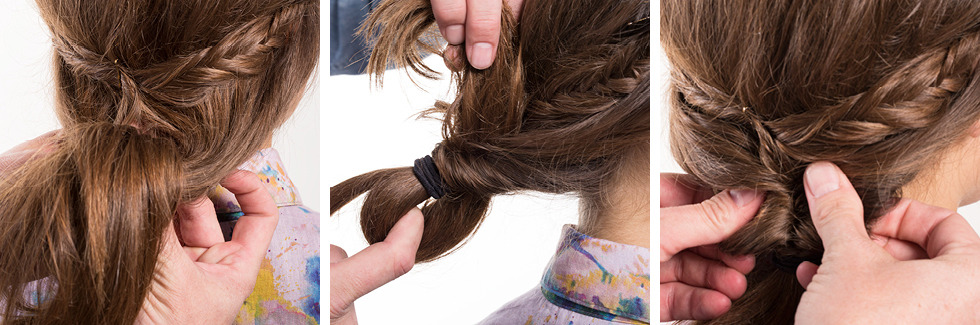
11: Gather your hair into a ponytail and secure with an elastic. Drag the ponytail holder down towards the lower part of your pony.
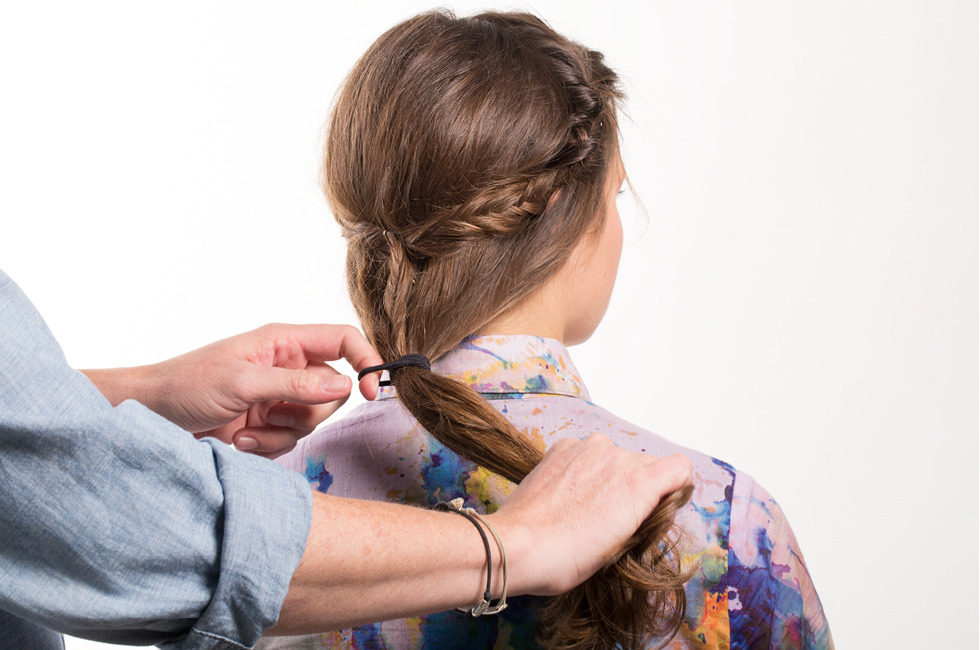
12: Split the hair that’s between the elastic band and your scalp down the middle, as pictured.
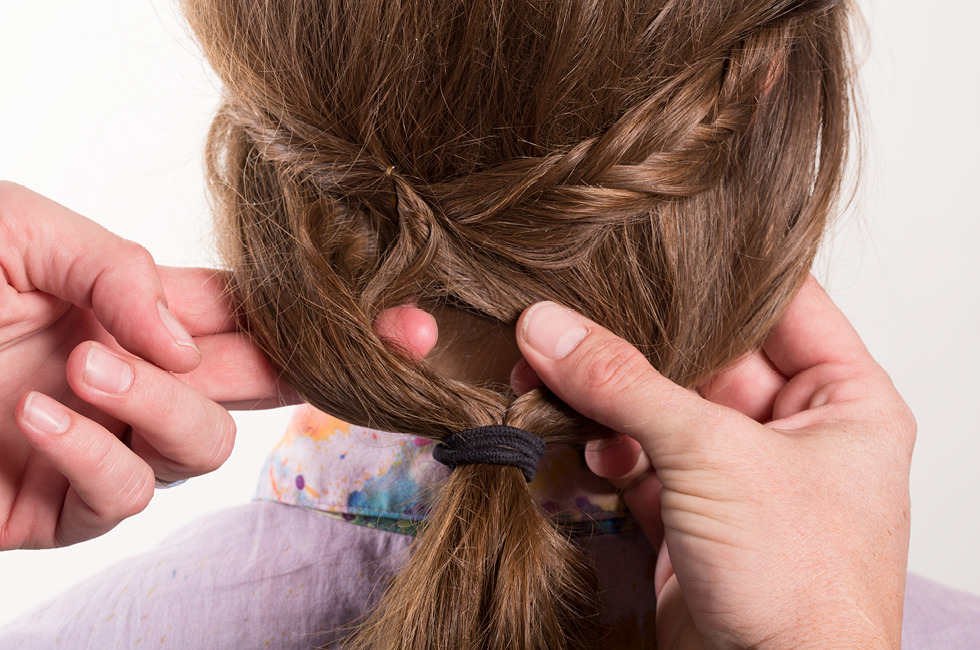
13: Loop the hair through the middle part and pull down, which creates a knot effect. If you want to make it a little more loose, pull the sides of the knot gently.
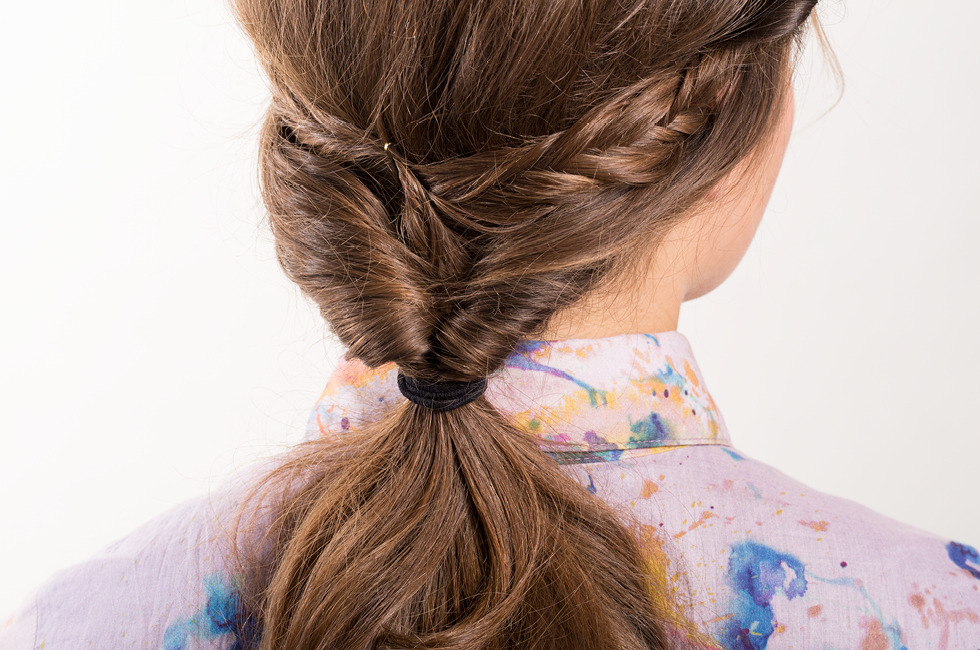
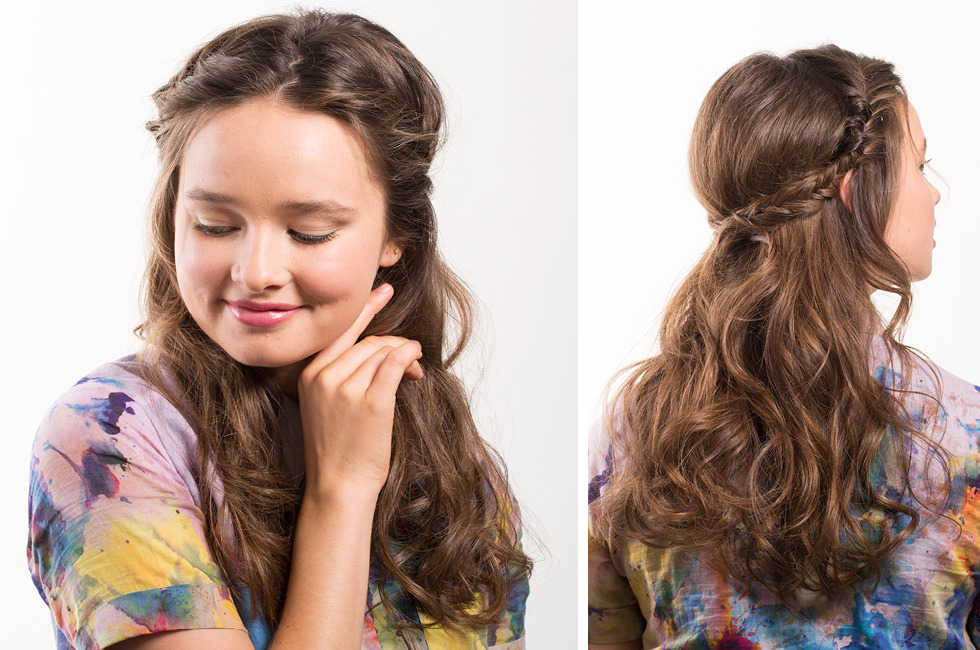
Ta-da! Told you it was easy!
-
Gift Guides
- 230
-
Bath and Body
- 174
Good Molecules: See a difference in your skin
New Arrivals
-
Nudestix Nude Beach 6-Piece Eye Pencil Palette
$69
-
Danessa Myricks Beauty ColorFix 24-Hour Cream Color Matte Sundaze
$20
-
Danessa Myricks Beauty ColorFix 24-Hour Cream Color Matte Oasis
$20
-

Danessa Myricks Beauty ColorFix 24-Hour Cream Color Matte Dreamsicle
$20
-
Danessa Myricks Beauty ColorFix 24-Hour Cream Color Matte Bunny
$20
You Might Also Like
-
Shampoo
Brighten Up Your Hair Color
- 179
-

Bridal Looks
Bridal Beauty Tips: Olive Undertone
- 126
-

Hand Treatments
3 Ways to Moisturize Dry Winter Hands
- 316
-
Tutorials
How To Do a Sock Bun
- 8624
-
Face Skincare
DIY Skincare: Face Scrubs
- 821
-
Hair
Short and Sweet Hair Inspirations
- 90
-

Hair
Lovely Styles For Long Locks
- 295
-
Hair
Emma Watson's Hair Transformation Revealed
- 46