


Poison Ivy Makeup :)!
13
Sort By


Good Molecules: See a difference in your skin
New Arrivals
-
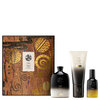
Oribe Gold Lust Collection (Oribe x Mathilde Herrero)
$120
-
Skindinavia All Day/All Night Makeup Finishing Spray (Neroli)
$16 - $39
-
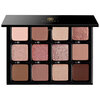
Viseart VisePRO™ Étendu Bon Bon Praline Lumière
$44
-
Danessa Myricks Beauty Glosswork 4D Ultra Shine Plumping Gloss It Girl
$26
-

Neen Pretty Shady Pressed Pigment Filled
$29
Oct 17, 2015
Lillee J.
Today I had done a Poison Ivy makeup look
"*Hourglass N28 Primer Serum
In my eyes, Poison Ivy must have dewy skin. This is where the Hourglass primer comes in handy! Not only does it create a protective hydrating barrier from environmental factor it forms such a unique dewyness I have yet to find with other primers. Just as we had done with the moisturizer allow the primer to sit for five minutes.
*Marc Jacobs Genius Gel- 14 Ivory Medium
Following the dewy trend, I applied two pumps over my entire face with a dampened beauty blender. I made sure to apply thin coats because much more will be added later. As I grabbed my highlighting and contour kit I allowed the foundation to set for two minutes!
*ABH Cream Contour LIGHT/MEDIUM- Banana, Cinnamon, Nude I noticed this pallet got dried out REALLY quick so I took out my handy Josie Maran Argan oil and put a few drops on each shade. Little did I know I made an amazing lightweight cream contouring unit! I used the shades Cinnamon, Nude, and Banana. As you might of guessed Cinnamon was used to contour, and I mixed Nude and Banana together for a concealing shade (didn't feel like going all out on concealer).
*Marc Jacobs Re (marc) able Concealer- 1 Awake
As I said before, I didn't go concealer happy. Instead I used this shade to highlight my under eye area as it provides a nice luminous effect to my skin. I blended this in with a Beauty Blender!
*Marc Jacobs Perfection Powder- 200 Ivory Bisque
To set the concealer I lightly tapped this on-top with the same Beauty Blender. This process just provides more coverage and combats an "oily" appearance!
*Too Faced Snow Bunny Bronzer
This bronzer is SUPER glittery, so it fits the occasion perfectly. I applied this to the outside contours of my face with a Nars #21 brush. This sheds warmth back into my face that was lost from contouring!
*KVD Shade&Light Contour Pallet- Subconscious, Lyric, Sombre
While it doesn't seem I did an intense contour in more ways that one I did! I used the Tarte Swirl Powder brush and first placed sombre right on the sides of my nose, hollows of my cheeks, and under my jaw. After placing sombre in these areas, I gently picked Subconscious and tapped off access powder. For a more defined look I applied Subconscious in the same areas as Sombre with the only difference of moving a couple of inches down for more natural effect. Lastly, using a Sephora #74 brush I applied Lyric under my eye in an upside down triangle shape, on the bridge of my nose, on my forehead, and on my chin!
*Benefit Dandelion Blush
I heavily applied this stuff because IT HAS NO PIGMENT. Why I bought this? No clue. Actually I have a review on the product here, so you might want to check that out as I provided swatches. Moreover, I used a dense Sephora Multi-Tasker Powder Brush and went to blush city. I went for a sheer blush because any other colors would take away from the colored glitter!
*Urban Decay Naked Illuminated- Luminous
This has to be one of the most beautiful highlighters EVER. It is super glittery so I made sure to first apply a sticky base (ELF Shimmering Facial Whip). I used my index finger to heavily apply this shade to my cheek bones. I skipped out on applying it to my nose and forehead because I let the facial whip do the rest of the work.
*ELF Shimmering Facial Whip- Spotlight
Before applying the UD illuminator I applied this to my cheekbones, the bridge of my nose, my chin, and lastly, my forehead. I used my fingers for this part because the whip is very thick making it almost impossible to use a brush!
*UD SETTING SPRAY: ALL NIGHTER
BTW I AM SO MAD (note the caps). This stuff is almost on its way of running out and its been only a month!! I think my travel size lasted longer. Hmpf. What saves this product is it actually does keep makeup in place.
Before I get into the face detailing I would like to begin with the eyes since the pigments chosen were all products used during this section of the makeup look!
*ELF Smudge Pot- Gotta Glow
Rather using an actual primer I decided to start with a cream eyeshadow with metallic reflects! I had applied a thin layer of Gotta Glow from my lid up to my brow with my index finger.
*Inglot #42 Pigment
Using a Mac 239 I applied this to the inner third of my eye. This golden color reflects green which is PERFECT for the next pigments to come. I used a patting motion for the pigment to insure optimal pigment
*Sugarpill Loose Eyeshadows- Mint Soda, Lumi, Grand Tiara
After applying the Ingot pigment I went right into Mint Soda and applied it center lid with the same 239 Mac brush. I made sure to pack on the shadow with slight smudging motions to blend it into #42. Then, I took the shade Lumi and using a 219 Mac brush tapped it in the inner corners of my eyes along with the tear ducts. Speaking of the tear ducts, I also added Grand Tiara to this shimmery mashup of colors for a more ethereal look!
*Mac eyeshadows- Swimming, Peacock, Kelly, Carbon
After working on the eyelid I moved onto the crease. In the crease I first applied Swimming with a Sephora Blending brush. I made sure to use big circular motions for a smoked out look. After creating a base shade I went onto Kelly, which I believe was a LE, and applied it in my inner V with a Mac 217. Unlike the motions used with Swimming, I used very short blending strokes to concentrate the color. Lastly, I took Peacock and deepened up the crease more!
~Peacock and Carbon are smudged on my lower lash line.
*KVD Tattoo Liner in Trooper
*HOL ICONIC
*ABH Brow Wiz in Soft Brown
*Too Faced Better Than Sex Mascara
*Stila Smudge Stick- Jade
I took Jade and applied it to my upper and lower waterlines for a coordinated look!
ONTO THE FUN PART...
Alright, to begin I worked from my right eye down. Sounds weird but completely makes sense when you do the intricate swirls and splotchy green ivy marks!
Using Sugarpills pigment in Mint Soda I took Sephora's Teardrop Highlighter brush and swept this in a C shape surrounding my eye- almost like I am applying a luminizer. I dragged the shade up to my forehead slightly for a "spread" out effect! With the same pigment and brush, I took the pigment onto my collar bones! All I did was brush the shade in random areas on my chest+collar bones.
As you can see from the photos I also created depth with a darker green! To create the depth I used Peacock by Mac and outlined my collar bones with a Mini Sephora fan brush. I literally swept this a few times where shadows naturally hit my collar bones and proceeded in creating definition on my neck as well. While moving up the neck I continued making random splashes of Mint Soda.
**MAKE SURE YOU PAT ON THE SHADES**
By patting on the shades it holds the glitter, and obviously we want the charm bomb to explode with this look.
I used two major glitters- MUFE #3 Glitter and OCC Mint Glitter.
ALSO KEEP IN MIND TOO FACED GITTER GLUE
In terms of the MUFE glitter, I patted this directly on-top of Mint Soda on my right eye! I also in some areas on my chest mixed the glitter with OCC Mint! This provided a beautiful golden/green glow.
For the swirly part that is suppose to represent vines, I took Stilas Smudge Stick in Jade and began by drawing a hook extending from my original winged liner. After I made the first hook, I connected it to hook in the opposite direction. Essentially the vines are a bunch of curly hooks :). Inside the hooks I applied Mint Soda pigment with a 219 brush and later added OCC mint glitter on-top!
LIPS
*Colourpop- BYOB
*YSL Rose Jersey Lipgloss
To create the glittered effect on my lips I simply patted on MUFE #3 and OCC Mint over the lipgloss with a fluffy shader brush. This wasn't a difficult task being you can design the placement any way you want! For instance, I put MUFE #3 on my cupids bow which some might not do as it draws a lot of focus to the lips! I call these the kiss of death lips. Yes. Kiss and die mwahahahaha."
This was super fun to create and honestly came off VERY easily which was a surprise to me! Can you guys list some look ideas for me? I have YouTube tutorial block (yes thats a thing now). HELLLP
Oct 17, 2015
Lillee J.
Oct 17, 2015
Lillee J.
literally one more view
DONT WORRY LOL
Oct 17, 2015
Lillee J.
Oct 17, 2015
Rissa G.
Yessss! Stunning! I love the shimmer to it.
Oct 17, 2015
Taylor G.
You look amazing! The skin looks flawless
Oct 17, 2015
Sophia G.
Amazing!!
Oct 17, 2015
Sabrina K.
Hi Lillee - Please remember that self promotion (promotion of a personal blog, youtube channel, website and so on) is only allowed in the intro and promotion section of Beautylish.
I'm going to remove the link to your blog so this post can stay in the makeup section!
Here's a run down of the forum rules:
(Forum Rules)
Please help us maintain positive conversations here by following our guidelines below. We reserve the right to remove comments and topics that don't adhere to the following. We also may remove the profile of any repeat offender. Thanks for reading and contributing!
Be Kind
Beautylish is a diverse, positive, and respectful community. It’s okay to disagree with someone, but be constructive—not rude. We have a zero-tolerance policy for negativity and harassment.
Contribute Thoughtfully
Take the time to make posts easy to understand by using proper spelling, grammar, and capitalization. Post topics in the appropriate category and refrain from making duplicate posts. Know that we don't allow self-promotion, advertisements, spam, commercial messages, or links to other websites or blogs. And be careful that you don't post someone else's work and present or claim it as your own.
We reserve the right to remove duplicate, miscategorized, and difficult-to-understand posts, or those we deem as advertisements, spam, or plagiarism.
Be Vigilant
Use the flag button to report inappropriate or disrespectful behavior, or email us at help@beautylish.com.
(Community Etiquette)
Be Kind and Open-Minded
Beautylish is a diverse and positive community that is ever-evolving. While tastes may be personal, please be respectful in your conversation and withhold judgement or criticism. We are all here to learn and grow.
Present Your Best Self
We believe being beautiful begins with putting your best foot forward in everything—attitude, appearance and presence. We hope you take that to heart and show everyone your best photos, best videos, and best reviews on Beautylish because it inspires all of us to become better.
Contribute Thoughtfully
We encourage you to contribute your opinions and reviews on products, but please try to use proper spelling, grammar and capitalization. Your two cents will be taken more seriously if you take the time to present it well.
When you submit videos and photos of your work, please categorize and label your submissions and tag the products you used. This extra effort helps others discover your work and learn from your examples.
Be Helpful and Avoid Self-Promotion
Beautylish is a community about sharing and helping others. Feel free to link or promote your work if it’s relevant in helping someone, but please don’t link or promote yourself without context. Also, please don’t post commercial messages for direct selling purposes or on behalf of a company or commercial enterprise.
Let Us Know
Beautylish doesn’t allow hateful or disrespectful activity. If you see something that seems inappropriate or wrong, please send us a note at help@beautylish.com.
Oct 17, 2015
Iris O.
Stunning!
Oct 17, 2015
Michelle S.
Looks amazing! Thank you so much for going into so much detail. I might try something like this out for an upcoming costume party :)
Oct 17, 2015
Sheslay F.
Ooh that looks super pretty! You did such a good job! (:
Oct 17, 2015
Lillee J.
Thank you @Iris, @Sheslay, @Taylor, @R.T, @Sophia. Also, @Michelle- this actually only took me an hour and a half! Considering the detail done and the time completed it's rather simple. If you do something like this post a photo of it :D!!
AND @Sabrina SORYY! Wasn't aware, no biggy!
Oct 17, 2015
Sabrina K.
Its no problem Lillee :) Now you know! And the look you created is so beautiful that I felt it had to stay up in the Makeup section so the girls could see it :)
Oct 18, 2015
Claire D.
Your lashes!!and I agree,your skin looks amazing
Oct 18, 2015
Tori T.
I'm in love with this!! You did amazing. It's absolutely gorgeous
Oct 18, 2015
Eve S.
Looks amazing and love the detail you post with x
Oct 19, 2015
Cindy S.
Looks amazing 😍