
DIY Beauty: Carrot Face Mask
Published Mar 22, 2011


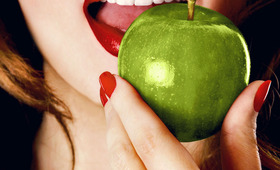
Not only are carrots good for your health, they can tone and clarify your skin, since they are naturally antiseptic and packed with vitamins (like carotene) and iron. Carrots are readily available all year round so your local grocery store should always have some in stock. Homemade masks made from carrots are most appropriate for people with normal to oily skin types but since you're the chef to these beauty recipes, you can include other ingredients that suit your own needs. My skin tends to be more on the dry side like myself, so I like to add in extra doses of extra virgin olive oil or even half of a mashed avocado to create a hydrating mask. Nom on some carrots while you whip up this easy face mask that will be soothing and delicious for your skin!
HOW TO Homemade Carrot Face Mask
-
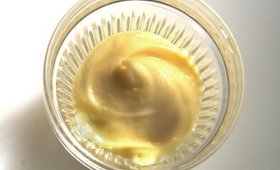
Peel & steam carrots. Peel one large carrot and steam or boil until tender (when a fork can easily pierce through it, it's ready). Mash the carrot with a fork or masher until it's a creamy consistency.
-
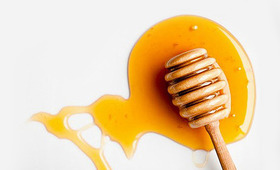
Mix in honey and extra virgin olive oil. Mix in half a tablespoon of honey and half a tablespoon of extra virgin olive oil. If your skin is oily, you may omit the extra virgin olive oil.
-
Add a few drops of lemon juice. Your skin type will depend on the amount of lemon juice you add in (lemon juice is a natural astringent, so the oilier your skin, the more lemon you want in your mask). If you have dry skin, add about 8 drops of lemon and if you have oily skin, add up to 1 tablespoon.
-
Check consistency. The mixture shouldn't be too clumpy or too runny. If the mix is too thick, you can add in a bit more extra virgin olive oil or water to thin it out. You can add a bit more honey to the mix to give it a thicker, paste-like texture.
-
Cool down. Let the mixture cool down so that the temperature is comfortable on your skin.
-
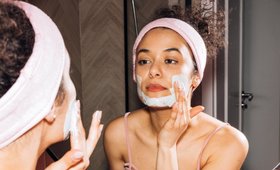
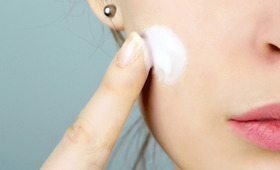
Mask time. Apply the carrot mask onto a clean and bare face, even your neck if you wish, but avoid the eye and mouth area. Leave it on for 10 -15 minutes and wash it off with warm water afterwards. Pat dry and follow up with your favorite moisturizer or eye cream.
Beautylish Tip: Like any skincare product, be sure to patch test the mask on yourself to ensure that negative reactions do not occur. If you ever feel any discomfort or irritation after you've applied the mask, wash it off immediately with warm water.
-
Nude Lips
- 1988
-
Products
- 587
-
Gift Guides
- 230
Good Molecules: See a difference in your skin
New Arrivals
-

Sisley-Paris Phyto-Sourcils Design 3-in-1 Architect Pencil 5 Taupe
$75
-

Sisley-Paris Phyto-Sourcils Design 3-in-1 Architect Pencil 6 Espresso
$75
-
Nudestix Nude Beach 6-Piece Eye Pencil Palette
$69
-
Danessa Myricks Beauty ColorFix 24-Hour Cream Color Matte Sundaze
$20
-
Danessa Myricks Beauty ColorFix 24-Hour Cream Color Matte Oasis
$20
You Might Also Like
-
DIY Hair
DIY Deep Hair Treatments
- 2151
-
DIY
DIY Edible Beauty Remedies
- 1682
-

DIY Makeup
DIY: Fixing Shattered Pressed Shadow
- 2880
-
Masks
The 5 Best Face Masks to Keep in the Fridge
-
DIY
What To Eat for a Whiter, Brighter Smile
- 653
-

DIY
This Spicy Pantry Staple is a Beauty Must-Have
- 1265
-

Sunscreen
What Does “Reef-Safe” Sunscreen Mean?
-
DIY Skin Care
DIY Acne Spot Treatments
- 2986