Merry Christmas everyone :)! I decided to do a darker twist on the holiday with classic shimmery gold shadow and a super black matte lip! This can be used with just about any lip color including blue if you'd like, so don't be intimidated by the glorious Limecrime Black Velvet Velvetine ;) By the way its like 70+ degrees here in NY talk about weird.
*Smashbox Photo Finish Primer
Smoothed all over my face as a priming base. Not quite my favorite but my Hourglass N28 exploded 🙃
*Too Faced Born This Way Foundation, Porcelain
With exactly one pump and my Marc Jacobs Face II Sculpting Foundation Brush I stippled this onto all zones of my face. Any excess product was also stippled on then finally buffed out with short downward strokes!
*Urban Decay Naked Skin Concealer, Fair Neutral
*Cover Fx Cream Foundation, N100
*Nars Multiple Stick, Copacabana, Portofino
I love cream contouring its like one of my favorite things to doooo! So, with UD Naked Skin Concealer I drew an upside down triangle under my eyes extending out to my hairline with one line going down from my forehead to the bridge of my nose, and finally one line from my left jaw to chin to right jaw. As far as contouring goes with my finger I drew two lines on the sides of my nose connecting at the tip as well as a cheek contour. Blending wise I took my Elf Ultimate Blending Brush and with circular motions buffed everything out :)! I took care of the rest of the creams by simply applying Copacabana from the stick to the "C's" of my eyes and down the bridge of my nose as well as with Portofino on the apples of my cheeks. You can either use your fingers to blend or do as I did by taking the Elf UBB and patting the products out!
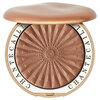
*Givenchy Poudre Bonne Mine Healthy Glow Powder, 4
*Smashbox Step By Step Contour Kit, Light/Medium
*Colourpop Highlighter, Smoke N Whistles
To add some warmth back to my face I took Givenchy's bronzer and with my Mac 168 blended the shade from my temples down to the hollows of my cheeks and finally to my jaw line. With the same brush I also VERY LIGHTLY recontoured the sides of my nose and chiseled my cheeks a bit more by defining them with Smashbox's Contour shade.
After I finished the contour I then went into Colourpops Highlighter and highlighted my cheek bones and the bridge of my nose with a Sephora Teardrop Highlighter Brush.
*MUFE HD Setting Powder
*Urban Decay All Nighter Spray
*ABH Dipbrow Pomade, Caramel
With a #12 ABH brush I simply spoolied through each brow, lined them and lightly filled them in with slight brush stokes!
*Nyx Jumbo Eye Pencil, Cashmere
Applied this all over my lid and blended up to my brow bone. The Jumbo Eye Pencil was used as a base, and between you me and the four walls I like the shade Cashmere much better than Milk.
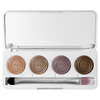
*BH Cosmetics 88 Cool Shimmer Pallet: Column 5 Rows 6, 7, 8
Basically with my Mac 239 brush I patted on 5.6 to the inner third of my eye, then 5.7 was applied mid lid followed by 5.8 on the outer half. I really wish they named these shades because it gets confusing saying column so and so with row such and such non stop!
*Nyx Pearl Mania Loose Eyeshadow, Mink, Walnut, Nude
Wherever you put the gradience of shades follow through with repeating these pigments on top. For example, Walnut was applied on the outer third then with a Mac 217 brush eased into the crease.
*Stila Smudge Stick in Lionfish
*Lancome Hypnose Doll Lashes, So Black!
*Ardell Demi Wispies #120
*HOL Lash Glue
Smudge Stilas Smudge Stick in Lionfish on the upper lash line as well as the waterline :)! If you want you can always opt in for a more dramatic black! I finished off with some falsies and mascara.
Wow. This is absolutely stunning! Your skin and eyes look amazing! The lips look great too, but reminds me too much of Halloween! I think you should switch to a deep red, but this still looks stunning and if you like it, that's what matters most 😊
Please help us maintain positive conversations here by following our guidelines
below.
We reserve the right to remove comments and topics that don't adhere to
the following rules. We also may remove the profile of any repeat offender.
Thanks for reading and contributing!
Be Kind
Beautylish is a diverse, positive, and respectful community. It’s okay to
disagree with someone, but be constructive—not rude. We have a zero-tolerance
policy for negativity and harassment.
Contribute Thoughtfully
Take the time to make posts easy to understand by using proper spelling,
grammar, and capitalization. Post topics in the appropriate category and
refrain from making duplicate posts. Know that we don't allow self-promotion,
advertisements, spam, commercial messages, or links to other websites or blogs.
And be careful that you don't post someone else's work and present or claim it as your own.
We reserve the right to remove duplicate, miscategorized, and difficult-to-understand
posts, or those we deem as advertisements, spam, or plagiarism.
Be Vigilant
Use the flag button to report inappropriate
or disrespectful behavior, or email us at help@beautylish.com.


Dec 25, 2015
Lillee J.
*Smashbox Photo Finish Primer
Smoothed all over my face as a priming base. Not quite my favorite but my Hourglass N28 exploded 🙃
*Too Faced Born This Way Foundation, Porcelain
With exactly one pump and my Marc Jacobs Face II Sculpting Foundation Brush I stippled this onto all zones of my face. Any excess product was also stippled on then finally buffed out with short downward strokes!
*Urban Decay Naked Skin Concealer, Fair Neutral
*Cover Fx Cream Foundation, N100
*Nars Multiple Stick, Copacabana, Portofino
I love cream contouring its like one of my favorite things to doooo! So, with UD Naked Skin Concealer I drew an upside down triangle under my eyes extending out to my hairline with one line going down from my forehead to the bridge of my nose, and finally one line from my left jaw to chin to right jaw. As far as contouring goes with my finger I drew two lines on the sides of my nose connecting at the tip as well as a cheek contour. Blending wise I took my Elf Ultimate Blending Brush and with circular motions buffed everything out :)! I took care of the rest of the creams by simply applying Copacabana from the stick to the "C's" of my eyes and down the bridge of my nose as well as with Portofino on the apples of my cheeks. You can either use your fingers to blend or do as I did by taking the Elf UBB and patting the products out!
*Givenchy Poudre Bonne Mine Healthy Glow Powder, 4
*Smashbox Step By Step Contour Kit, Light/Medium
*Colourpop Highlighter, Smoke N Whistles
To add some warmth back to my face I took Givenchy's bronzer and with my Mac 168 blended the shade from my temples down to the hollows of my cheeks and finally to my jaw line. With the same brush I also VERY LIGHTLY recontoured the sides of my nose and chiseled my cheeks a bit more by defining them with Smashbox's Contour shade.
After I finished the contour I then went into Colourpops Highlighter and highlighted my cheek bones and the bridge of my nose with a Sephora Teardrop Highlighter Brush.
*MUFE HD Setting Powder
*Urban Decay All Nighter Spray
*ABH Dipbrow Pomade, Caramel
With a #12 ABH brush I simply spoolied through each brow, lined them and lightly filled them in with slight brush stokes!
*Nyx Jumbo Eye Pencil, Cashmere
Applied this all over my lid and blended up to my brow bone. The Jumbo Eye Pencil was used as a base, and between you me and the four walls I like the shade Cashmere much better than Milk.
*BH Cosmetics 88 Cool Shimmer Pallet: Column 5 Rows 6, 7, 8
Basically with my Mac 239 brush I patted on 5.6 to the inner third of my eye, then 5.7 was applied mid lid followed by 5.8 on the outer half. I really wish they named these shades because it gets confusing saying column so and so with row such and such non stop!
*Nyx Pearl Mania Loose Eyeshadow, Mink, Walnut, Nude
Wherever you put the gradience of shades follow through with repeating these pigments on top. For example, Walnut was applied on the outer third then with a Mac 217 brush eased into the crease.
*Stila Smudge Stick in Lionfish
*Lancome Hypnose Doll Lashes, So Black!
*Ardell Demi Wispies #120
*HOL Lash Glue
Smudge Stilas Smudge Stick in Lionfish on the upper lash line as well as the waterline :)! If you want you can always opt in for a more dramatic black! I finished off with some falsies and mascara.
Dec 25, 2015
Lillee J.
Dec 25, 2015
J L.
I loveeee this look! You're gorgeous! Merry Christmas to you too (:
Dec 25, 2015
Lillee J.
Hehe thanks Jocelyne <3
Dec 25, 2015
Ms L.
Gorgeous!! You did a great job with the eyes. I love the cat eye with the lashes!! And I I love your eye color! :)
Dec 25, 2015
Carmen V.
Omg. Girl... You did great
Dec 25, 2015
Valerie C.
So nice 😍
Dec 25, 2015
Dana E.
Wow it looks beautiful!!
Dec 25, 2015
Molly B.
Stunning!! Love that you did a black lip. :D.
Dec 25, 2015
katie s.
Wow. This is absolutely stunning! Your skin and eyes look amazing! The lips look great too, but reminds me too much of Halloween! I think you should switch to a deep red, but this still looks stunning and if you like it, that's what matters most 😊
Dec 25, 2015
Lillee J.
Thank you guys :) @Ms.L @Carmen @Valerie @Dana @Molly @Katelyn honestly and lip color works for this, thank you :)!
Dec 25, 2015
Nikelle B.
Beautiful! even though you used dark colors it still looks festive. I love it!
Merry Christmas to you too!
Dec 25, 2015
L D.
This is really cool I never thought about this sort of Christmas twist , it is amazing 😄
Dec 27, 2015
Maeve C.
Those eyes are on point