


Glitter tattoos may seem akin to carnival face painting, but they've recently emerged as a popular beauty accessory like their blinged-out nail counterpart. We witnessed hundreds of our community members line up at The Beauty Social for Urban Decay's sparkling skull and snake tattoos, and we loved seeing everyone walk around with their dramatic arm candy. Many beauty brands sell pricey glitter tattoo kits that we've tested and loved, but you don't have to shell out a lot of money for this trendy temporary body art. Create your own custom DIY glitter tattoos with items you most likely already own.

What You'll Need
-
1 sheet clear contact paper The tacky paper you line drawers with, available at drugstores
-
1 pair scissors
-
1 thin marker
-
X-Acto knife Available at any craft store
-
Rubbing alcohol and cotton pads
-
Clear lash glue
-
Cotton swabs
-
Fine craft or cosmetics-grade glitter Use craft glitter on the body, and cosmetics-grade glitter on the face
-
Hair spray or makeup finishing spray Mist hair spray on the body and finishing spray on the face
Step 1
DESIGN AND DRAW YOUR TEMPLATE
First envision the scale and style of your design, then cut your contact paper to size, leaving at least half-inch margins. Draw your design on the contact paper with a dark marker before you cut anything. We drew bird silhouettes, and recommend you start with a simple design to practice. Place the template over the area where the tattoo will be applied and make sure you're happy with the layout.

Step 2
CUT OUT YOUR DESIGN
Use an X-Acto knife to carefully cut out your template over a safe surface such as an old magazine. Take your time and try to get the cleanest lines possible. Remember, don't peel anything yet!

Step 3
PREP, APPLY, AND LACQUER
Soak a cotton pad with rubbing alcohol or use an alcohol wipe to sterilize the area where you’ll place the tattoo. Once your skin is completely dry, peel the clear contact paper from the backing and put it on your body. Press firmly to make sure the stencil has completely adhered to the skin. Apply an opaque layer of lash adhesive to the exposed skin in the template and let it get tacky for 10 seconds. Then quickly remove the template, revealing a glue silhouette of your design left behind.

Step 4
SPRINKLE AND SPARKLE
Before the glue dries, sprinkle a heavy layer of glitter over your design. Press lightly with your fingers to be sure the glue is entirely coated. Dump the excess glitter back into the bottle or into the trash can and clean up the extra sparkle on your skin with a cotton swab. The design possibilities are endless in this step—use multiple colors in various ombré or color-blocking techniques for a custom finish.

Step 5
REVEAL YOUR ART AND SEAL THE DEAL
Let your glitter tattoo dry for approximately one minute, then spray it with hair spray or a makeup finishing spray designed to enhance its durability. Your tattoo should last two or three days, and will wash away easily with soap or baby oil.

Good Molecules: See a difference in your skin


You Might Also Like
-

Makeup Removers
DIY Beauty: Makeup Removers
-

Fitness
DIY Summer Beauty Elixirs
-

Hair Removal
Permanent Hair Removal Part 1: Laser, IPL, or Tria?
-

Hair
3 Steps to Refresh Your Hair Style
-

Trends
How To Master The Matte Lip
-

Mascara
Make the Most out of Your Mascara Wand
-

Products
Best Foundation for Women of Color
-
Tips & Tricks
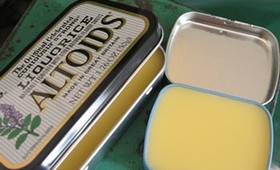
DIY Beauty: Make Your Own Lip Balm