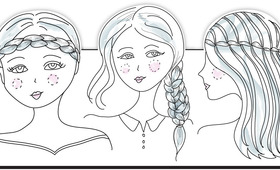
We can safely say that the fishtail braid or plait is a Beautylish favorite. Whether perfectly neat or purposely messy, the texture and seemingly complicated pattern of this sea-inspired style provide a refreshing visual twist on your typical 3-strand weave. We're here to bring you even better news: This 2-strand braid is the simplest of them all! The fun doesn't stop with a single plait, and it's easy to experiment with multiple braids, styles, and accessories. But before you go braid-crazy on your locks, you've got to learn the basics. Turn your hair into high-fashion form—once you've mastered our fishtail fundamentals. Here's an easy fishtail braid tutorial to get started:
_STEP 1 _
Brush & Section
Detangle and brush out your hair so it's easy to handle. If you need to, smooth out flyaways and frizz with a grooming cream. You don't have to have stick straight locks to rock this look, just keep things knot-free! Divide the hair into two even sections starting from the middle of the scalp.
STEP 2 + 3
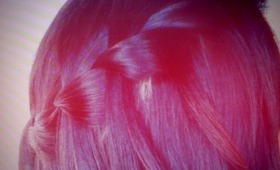
** Weave From The Right**
You can begin braiding from either side, but we're starting from the right. Use your pinky and ring finger to grab a small section of the hair (approximately 1/4" inch) from the back of the right side. Add this section to the left side by folding it over with your left hand.
STEP 4 + 5
Weave From The Left
After you've added a strand to your left side, take your left pinky and grab a 1/4" strand from the back of the left section. Fold it over and add it to your right section. Make sure these first few strands are tighter so you get comfortable with the process and nothing falls loose.
STEP 6
** Continue Weaving and FInish Up**
Continue weaving strands from the left and right. You're going to be weaving more or less depending on the thickness of your strands. But trust us—the fishtail effect looks so much better when you weave thinner pieces instead of thicker. It make take longer, but it's worth it!
Once you're at a comfortable place to end your braid, secure it with an elastic band or a clip. If you feel like your braid is too tight, loosen it by gently massaging the strands with your hands. Grab both hands simultaneously and gently pull away from the braid. This technique gives the braid that casual and effortless look.
OPTIONAL
** Add Personal Touches**
Styling elements add a dash of whimsy to this relatively simple design. Incorporate ribbon, feathers, barrettes, headbands, or whatever hair flair you may own. For longer hair, don't stop with a basic side braid—experiment with different styles! Try twisting your fishtail into a gothic-looking updo or add more flair by adding a headband. With a handful of bobby pins and hairspray, the possibilities are truly endless.
Want to learn how to learn how to create a fishtail braid via video? Check out three of our favorite fishtail braid tutorials on Beautylish!
 Easy Fishtail Braid / Plait by Imogen F.

 Fishtail Braid Tutorial by Hayley M.

 Elle Fanning Fishtail Braids Hair Tutorial by Katie M.

Good Molecules: See a difference in your skin

New Arrivals
-
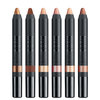
Nudestix Nude Beach 6-Piece Eye Pencil Palette
$69
-

Danessa Myricks Beauty ColorFix 24-Hour Cream Color Matte Sundaze
$20
-
Danessa Myricks Beauty ColorFix 24-Hour Cream Color Matte Oasis
$20
-

Danessa Myricks Beauty ColorFix 24-Hour Cream Color Matte Dreamsicle
$20
-

Danessa Myricks Beauty ColorFix 24-Hour Cream Color Matte Bunny
$20