
MOTD: Attempt at baking! + Nars ITA brush.
3

Sort By


Good Molecules: See a difference in your skin
New Arrivals
-
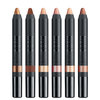
Nudestix Nude Beach 6-Piece Eye Pencil Palette
$69
-
Danessa Myricks Beauty ColorFix 24-Hour Cream Color Matte Sundaze
$20
-
Danessa Myricks Beauty ColorFix 24-Hour Cream Color Matte Oasis
$20
-

Danessa Myricks Beauty ColorFix 24-Hour Cream Color Matte Dreamsicle
$20
-
Danessa Myricks Beauty ColorFix 24-Hour Cream Color Matte Bunny
$20
May 25, 2016
Dana E.
I blended like crazy but still kinda feel like it wasn't enough so feel free to let me know if it looks a little harsh :)
Face:
-MUFE hydrating primer: just applied it with my fingers around my nose and t zone
-it cosmetics CC Cream in light: used my beauty blender and dabbed it all over my skin and it gave me even greater coverage than a brush (thanks Alexis!)
-Maybelline fit me concealer in vanilla: applied under my eyes, forehead, and bridge of my nose. Blended it in with my BB.
-ELF HD powder in sheer: I used this on a wet beauty blender and applied this under my eyes and let it sit for 10 minutes while I did my eyebrows.
-Lorac pro contour palette: used the lightest contour shade to contour my cheekbones and hairline with my nars ITA brush.
-too faced chocolate soleil bronzer in milk chocolate to bronze up my face
-ELF HD powder: used this again on a wet beauty blender and lightly cleaned up my cheekbones and let the powder sit
-tarte Amazonian clay brush (forgot the shade name sorry)
-Carli bybel palette: used the lightest highlight shade to highlight above my cheekbones, nose, and Cupid's bow
Eyes:
-Anastasia brow wiz in taupe for the brows
-UD eyeshadow primer potion in Eden on my lids
-too faced chocolate bar palette: white chocolate all over my lid, milk chocolate in the crease, amaretto (definitely spelled wrong) on top of the milk chocolate in my crease
-nyx matte black liquid liner
-loreal voluminous mascara in carbon black
-tarte lights camera lashes on my lower lash line
I brushed off all my translucent powder and set my face with the ELF makeup setting spray (better than urban decay all nighter in my opinion and I have both). Nothing on the lips but Chapstick!
I actually am really happy with the way the baking came out! I think it made more a difference below my cheekbones than underneath my eyes. I don't feel like I have that "airbrushed" look underneath my eyes lol. I plan on looking into the RCMA no color powder so I can improve with that technique!
I finally caved and I don't really see the hype about the nars ITA brush. I feel like it was hard to blend because the point of the brush was to give you a strong contour however when I was blending I feel like I almost defeated the point. If anyone has this brush I would love to hear how you use it!!
I'll post a side view and a frontal view :)
May 25, 2016
Dana E.
May 25, 2016
Marleen B.
It kinda looks like the angle of your contour is a little low, like it's pointing BELOW the edge of your lip. Depending on your face shape, either pointing towards the edge of your lip or a bit higher may look a little more uplifting and natural looking. I don't own the ITA, but I have tested it in store and didn't like it. Too wide & rough for my personal preference. If I owned it, I would probably only use the EDGE of the brush to blend only. I would use a different brush for the initial application.
May 25, 2016
Dana E.
Hm okay I see what you mean. Yeah I can tell now my placement is a little off, I feel like always struggle with that honesty lol. I'll try that next time. Thanks Marleen!
May 25, 2016
Marleen B.
You're welcome, good luck and have fun!
May 25, 2016
Jacqueline H.
I'm impressed that you actually got the contour to look that blended with the NARS Ita. ;) Big kudos to you. :)
Placement wise, I just would not bring it so far down and low. You have very nice bone structure, so to really pop those cheekbones, concentrate the product in the hollows. You find the hollow part by placing your fingers on the sides of your face, and where you feel it dip underneath the bones, just above that area is where you place your product and then blend it in small circular motions to diffuse it a bit.
In my opinion, there really isn't a right or wrong brush, it really does come down to preference. I found the Nars Ita to be very overpriced for the actual quality you get. Very scratchy and rough. I use a few different brushes to contour, so if you are ever in the market for a new contour brush, let me know and I'll give you some suggestions if you are interested.
I love RCMA No Color; however, in my opinion, there is a better way to get that airbrushed look without having to use more copious amounts of powder: Charlotte Tilbury Airbrush Flawless Finish Powder. This powder... omg... I truly believe Charlotte Tilbury was touched by an angel when she came up with this powder. Instead of 'baking' all you really have to do is just set the area with a bet of setting powder and then go over the area with a bit of Charlotte's powder, and you'll get that airbrushed look with less product. This powder softens and diffuses lines, enlarged pores, and it'll give the skin the most beautiful, slightly illuminated look.
Texture wise, this powder feels like nothing I've ever experienced before... on the skin, it feels like finely spun silk, and you will not need to touch up the 'baked' area nearly as much with this powder versus using just a traditional set powder, and it looks far more skin like versus just a bunch of packed product on the skin. It's $45, but it's worth each and every penny. :)
http://www.beautylish.com/s/charlotte-tilbury-air-brush-flawless-finish-1-fair
May 25, 2016
Dana E.
Thank you so much Jacqueline! I always appreciate when you actually take the time to be so informative and detailed in your suggestions :)
What do you use your RVMA powder for if not for setting?
I would love to hear what brushes you use to contour!
May 25, 2016
Jacqueline H.
Oh I do use the RCMA No Color to set foundation and concealer, I was only speaking of using it in terms of cooking/baking; The skin under our eyes is very different than the skin on the other areas of our face, and using a heavy amount of powder on top of a complexion product under the eye, is kind of like playing with fire. I'm not particularly fond of this technique, only because it can look very heavy handed and stiff, and through the course of the day and/or evening, it starts to sink and crumble making the other area (s) look very different from the rest of the face. Cooking/baking technique wise has been around for forever, and I understand the 'why' behind it; however, in my opinion, there is a better way to do it without using heavy amounts of powder under the eye. If I really want to pop the eye area, all I do is set the area with a small amount of RCMA no color, and then just make one pass over that with the Charlotte Tilbury Airbrush powder. You'll get the same effect but with far less product, and the application will be far more stable. ;)
The brushes I use most frequently: From the far left... Rae Morris Ultimate Cheekbone, Wayne Goss Brush 16, and Kevyn Aucoin's Contour Brush
Rae Morris Ultimate Cheekbone: This brush is just the bomb. I didn't know what I was missing until I purchased this brush. With Rae's Ultimate Cheekbone brush, you can easily contour and shade with powder products. Rae's brush is a slanted brush; however, unlike most most of the brushes with this shape, her's is not as dense, and it is far more streamlined. You can really pop the cheekbones by coming directly under the cheekbone, (you don't have to coat the entire bristle length with product,) and use a kind of flick or pop motion with the brush in a slight upwards motion. You can then change the angle, and swipe the brush through the temple. The simple motions one makes with this brush can really pop the bone structure. You will get the perfectly sculpted cheekbone each and every time in seconds.
This brush is made with Blue Squirrel which is very soft, delicate and pricey. It applies powder products softly; however, with this type of bristle, it is very easy to build up the product for a more defined look. Most of the time, brushes of this nature have goat bristle mixed into the Blue Squirrel for more intense product pickup and to provide some support to the delicate nature of the squirrel. I am so happy Rae did not add any goat bristle to this brush. This brush makes me smile. :)
Wayne's #16: This one is a larger domed round brush that Wayne likes to use for blending shadow. Personally, I find that it is way to big for the eye area, but that's just me. I found that this brush really fits well into the hollows of the cheeks quite nicely. It picks up and deposits color quite nicely, and once you lay the product in the hollows, this brush makes it easy to move and blend the product at the same time.
Kevyn Aucoin Contour brush: This one is a fantastic multi-tasker: I use this brush to highlight and contour. It's medium-sized brush with a tapered top that allows one to shade and/or blend. I also love to use this brush to blend on the neck and decollete and neck areas.
The best personal advice I can offer up is this: While the shape of the brush is important, it's not the only thing that matters. It's all about your technique: you can change the angles, flick the brush, do very short strokes or very long strokes. Thinking out of the box with makeup brushes will bring/give you new techniques that may change one brush from being difficult to work with into a brush that you can't do without. ;)
May 25, 2016
Dana E.
Thank you so much!! I'm going to look into them and I'll let you know how it goes :)
May 26, 2016
Jacqueline H.
You're welcome. Have fun with it, and please do keep us updated. :)