

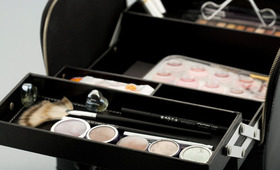
Achieving a flawless face isn't just about the makeup, it’s also very much about how it's applied. Any makeup artist will tell you that the secret to their application is what they work with. The right tools can help you achieve your makeup goals precisely and effortlessly, transforming a basic makeup job into a look worthy of a beauty editorial.
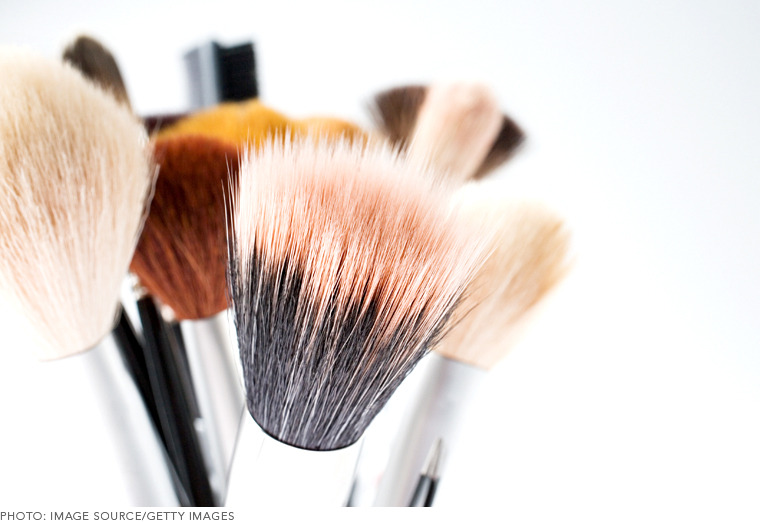
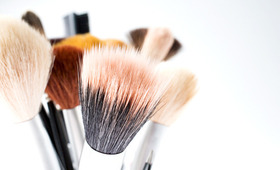
Probably the most important tool in your kit are your brushes. A good selection of these essential instruments will help you add depth and dimension, and give you precision in every part of your application. As a makeup artist who works every day and in all areas of the industry, I’ve discovered brushes can provide endless possibility in my artistry, and it’s crucial for you have the right tools in your arsenal as well.
With so many options available, it can be difficult to know what brushes you actually need. But don’t worry, I am going to guide you through the process of building a basic brush set and help you choose what brushes are best for you.
Brushes
Makeup brushes will be the most important tools you use, and getting the right ones together in your brush roll requires consideration, investigation, and evaluation. Many artists choose to start out with a prepared brush set available from any number of makeup brands, but in my experience, choosing to assemble your own brush set allows you to tailor choices made to your individual application style. This à la carte approach to acquiring brushes helps you really understand how and why one brush might be a better option for you than another.
In choosing your brushes overall, it is important to take into account the material they are made from and the benefits of those materials. The brush hair, how it is manufactured, and the name on the handle all factor into the price, so you will need to be realistic about how you spend your money. An expensive tool can sometimes be jarring at first glance, but you should realize that your brush set is often a lifetime investment. With proper care, you can use the same tools for your entire career—I’ve had some of my brushes for 17 years and they haven’t failed me.
Natural vs. Synthetic
Traditionally, natural hair brushes were thought to be better for dry products like powder blush and eye shadow. The many varieties of hair (including badger, pony, goat, sable and squirrel, to name a few) all have their own specific attributes. For example, sable is a versatile hair that works well with wet or dry product, while badger is perfect for picking up and allowing control of pigment.
Synthetic brushes were thought best for cream or liquid products such as concealer or foundation because they absorbed less product than natural hair, but things have changed. Advances in manufacturing and technology over the past decade have made synthetic brushes a viable alternative to natural brushes for almost all application needs. Many artists choose synthetic brushes over animal hair because of the cruelty-free aspects. Many popular brands such as Obsessive Compulsive Cosmetics take a firm stand on being a vegan line, while full-range collections such as Crown Brush have entire range of synthetics in every shape and form.
Brush makers are also addressing the concerns of the green movement. Bdellium Tools Green Bamboo series is ideal for the artist with a conscience. Bamboo is an excellent green resource and alternative to traditional woods because it’s repaid regrowth makes it one of the most sustainable resources on the planet.
In terms of performance, don’t worry so much about whether your brush hair is natural or synthetic—just as long as it can accomplish the artistry you desire. No matter the brush, bristles should not be rough or stiff and should have some flexibility to allow you to work with the contours of the face and eyes. A firmer, denser brush will deposit more color than a softer, fuller brush, so when choosing your brushes, remember you will need a combination of many textures.
Brush Shape and Size
When it comes to brushes, size definitely matters—meaning, you will need small, large and everything in between for your work. When making a choice, think about the size and shape of facial area where you are using your brush. For example, you would not use the same size brush to apply foundation over the entire face as you would to apply concealer under the eye.
Also think of your brushes in terms of their versatility. I do not tend to label a brush as I find they each can have many uses. For example, instead of labeling brushes specifically for foundation, concealer or lips, just consider them as three firm oval brushes in a large, medium and small size. This allows you to imagine using each brush in the manner you choose. Most brands will label a brush for one particular purpose, i.e. foundation, powder, concealer, etc...but I find that if you ignore the label and look at the possibility of the brush itself, you can really use each tool to achieve any effect you need in your application.
Let’s go through some of the basic must-haves when building your brush and tool kit in their traditional labeling. Listed below are a few of my must-have suggestions.
 Foundation Brush
 Foundation Brush
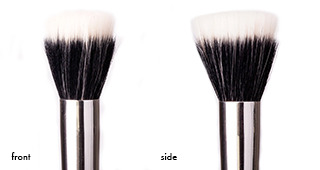
Foundation brushes have many uses, but the large oval brush has become accepted by many as a must-have tool. Ideal for applying and blending liquid or cream foundation, it is a staple tool that puts product on the skin without the worry of it absorbing into the sponge or leaving behind fine lines. Another option that has become popular is the duo fiber brush which can create softer layers. The circular application style buffs the product onto the skin for a beautiful finish.
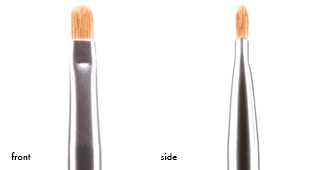
 Concealer Brush
 Concealer Brush
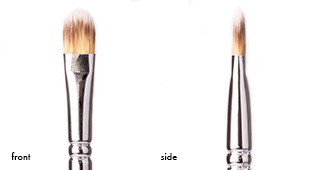
This medium-sized oval brush is available in a multitude of bristle options including sable or badger to name a few. The brush is used to place cream product over blemishes, imperfections or under the eyes. Many artists have moved away from using a firmer version, but this is a great basic brush for your kit as it allows for detail. Plus, the shape is very versatile.
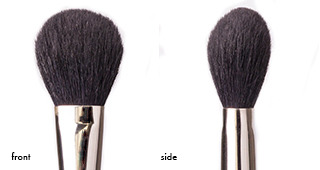
 Powder Brush
 Powder Brush
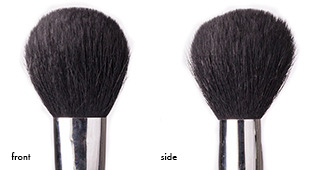
A soft, round brush has always been the go-to for applying powder product. These brushes vary in price depending on the hair or fiber that is used and whether or not they are hand made. I am not a fan of large powder brushes, so I use smaller brushes to gain more control, but, nevertheless, the classic powder brush is a staple in most makeup artist kits. Dip the brush, tap off the extra product, and then buff, press, and roll the powder onto the skin to remove shine and set.
 Blush Brush
 Blush Brush
This brush is customarily a soft, medium-sized dome shape or flat brush. The longer, softer bristles allow you to apply powder product without disturbing the foundation underneath. It’s ideal for blushes, bronzers or powder product in larger areas which need more precision.
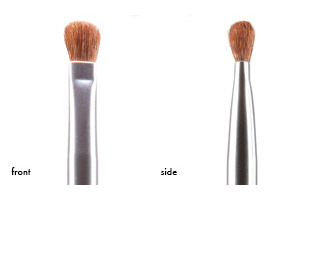 Shadow Brush
 Shadow Brush
Shadow brushes come in endless amounts of shapes, sizes, and hairs. There are a number of these brushes created for the eye area, but a basic set of three is enough to allow you to create any desired eye. A soft, stiff, flat, natural brush is brilliant for depositing all over shadow because it will pack the color onto the skin. A small, soft, fluffy brush is ideal for the eyelid area and lets you build your product to your desired intensity. Lastly, a dome shaped shadow brush with a soft bristle is great for getting rid of hard edges and blending or spreading soft color into the crease. You will find that eye shadow brushes are unlimited and you will be adding more to your arsenal as you develop your own preferences for application, but these three brushes will get you started on your way.
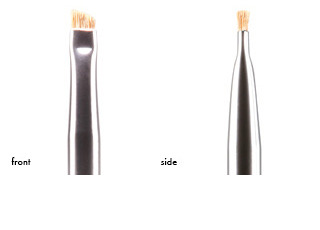 Small Angled Liner
 Small Angled Liner
This multi-purpose synthetic or natural brush is a great option for eyeliner and eyebrows. The size and shape allows you to mimic natural hair in the brow or bring product along the lash line like you would a pencil. As you build your kit, you will want to pursue a firmer, harder brush for brow and a softer bristle for liner, but the two can be interchangeable as you build. For use as a liner, place the brush on the inner corner of the eye and press into the lash line, pulling the brush across to create a perfect line. To use it for the eyebrows, fill in sparse brows with powder or cream by making short strokes over your natural brow shape.
 Lip Brush
 Lip Brush
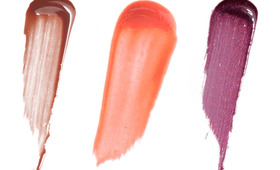
A small, flat, square, round, or oval brush can make a lip application easier. Coat the brush with lipstick. Then, starting at the center of the lips, blend out to the edges. Using the tip of the brush, define edges by using short, precise strokes to blend liner and lipstick together. Finish by applying more lipstick where you think you want depth or impact.
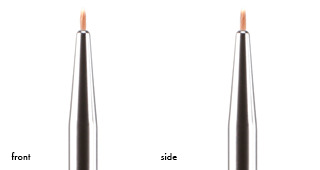 Liquid Liner Brush
 Liquid Liner Brush
An extra fine tip brush that can deliver a precise, even application is great for liquid or cream liners or applying any product where you need accuracy. For eyeliner, sweep the brush across the lash line from the inner corner outwards in an even motion.
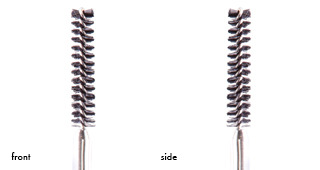 Brow Comb or Spoolie Brush
 Brow Comb or Spoolie Brush
For separating clumpy lashes or combing through an eyebrow, this brush is a great finishing tool.
Extra Brushes
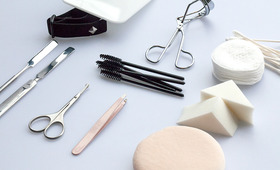
As your career grows, your brush roll will get bigger and you will come to find those brushes that are a must-have in your own application. For me, some of those brushes include small fan brushes, metal lash combs and specific brushes from specific brands. You will also want to have more than one of each brush on set with you in case you are working with multiple clients or colors.
Brush Care
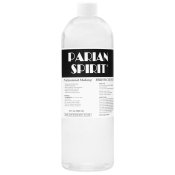
Once you purchase your brushes, you need to learn to protect your investment. Do this by cleaning, sanitizing, reshaping and drying properly. Cleaning and keeping your brushes sanitized on set is simple with a quick dry brush cleaner. My favorites are MAC Brush Cleaner or Make Up For Ever Brush Cleaner. For a deeper clean in between uses, try a stronger brush cleaner like Cinema Secrets or Parian Spirit. I also recommend shampooing your brushes in between clients when you have time to allow them to dry. Use a mild shampoo and rinse the brushes in warm water. Shape them back into their original silhouette and lay them flat to dry. I love to use Dr. Bronner’s soap to shampoo mine as it is anti-bacterial, but any mild shampoo will do.
As you build your kit you will start to make decisions on what product and tools make you the best makeup artist you can be. Let these basics chart you on the right course and keep your eyes and mind open to all possibilities. Always remember to make the decisions that are right for your own artistry and your own style of application. I am constantly discovering new versions of brushes or learning new techniques that require a different tool, even after my many years in the industry. As you work as a makeup artist, you will develop your own signature style and you will learn what brushes, products and must-have makeup items are right for your application. You’ll learn to make the decisions to keep you working and looking like a pro. Meanwhile, Beautylish and I will be here to assist you in answering all of your makeup kit questions and concerns!
Check out Part 1, Part 2, and Part 3 of James Vincent's Building Your Kit series, and stay tuned for Part 5: Tools of the Trade
As Director of Artistry for The Makeup Show, The Powder Group and On Makeup Magazine, makeup artist James Vincent has touched every facet of the industry with his talent. With specialties in film and theatre, television and celebrity work, editorial and runway work, James is foremast a passionate educator, training for brands such as MAC, Stila, CNN and Lancome. He continues to inspire the next wave of artists with his beauty expertise. Follow James on Twitter

Featured Products
También te puede gustar
-
Building Your Kit
Building Your Kit Part 22: Red Carpet Beauty Secrets
- 835
-
Building Your Kit
Building Your Kit Part 2: It's in the Bag!
- 3995
-
Building Your Kit
Building Your Kit Part 4: Brush Up!
- 6880
-
Building Your Kit
Building Your Kit Part 5: Tools of the Trade
- 4555
-

Building Your Kit
Building Your Kit Part 8: The Complete Guide to Eye Shadow
- 2002
-
Lip Gloss
Building Your Kit Part 15: Create A Versatile Lip Gloss Collection
- 781


