


Beauty trickster Sarah Woolley is delightfully deceptive when it comes to her hair. A self professed “wig queen,” her Youtube channel All Dolled Up gives us an explanatory glimpse into her psychedelic dreamland of hair, makeup, and magic. Her groovy style is eye-catching, but it’s her attention to detail that keeps us coming back for more—not to mention her darling Australian accent! Sarah explains that it may take a bevy of extensions, but only minimal effort to go from a cropped bob to her signature half-up half-down weave style. Learn her secrets below!
More hair equals more fun.
I buy my extensions off Ebay because you can often buy extra-long ones that are difficult to find elsewhere. I like to wear my extensions longer than twenty-six-inches, which is often the cutoff with commercial suppliers. I look for “remy” hair [high-quality human hair] that has a good weight for the price—more weight means more hair.
Don’t skimp on weave—even if your hair is short.
You can wear long extensions with any length of hair. It all depends how you put them in. I usually use about 18 to 20 extensions of different widths ranging from one-inch to eight-inches for this style. The result is a super full look that I like to wear when I go out. During the day you could get away with less per layer depending on your hair. Play around.
Lay out your tools.
Apart from the extensions, you’ll need a few sectioning clips, hair spray, some bobby pins, a teasing comb for your roots, and a hair brush. I use a boar bristle brush because it smoothes out my hair nicely.
Start low.
First, I create a very straight parting down the center of my head. Then I gather the back up with a sectioning clip, leaving the lowest section of hair near the nape of my neck down. Tease the hair at the nape, and fix with hair spray. This will help the extensions grip better.
Clip away.
I start by clipping an eight-inch wide quad weft over my teased hair. Then I clip a five-inch weft directly to the center of the eight-inch one. To hide my real hair sticking out at the nape of my neck, I tuck a one-inch wide weft under each side of the layer I just placed which keeps my short layers hidden. Finally I add a three-inch wide piece to either side of my head behind my ears to add more volume to the front. That’s my first layer.
We’re only halfway there.
Take down your real hair and section off another layer from ear to ear. After you tease and spritz with hair spray, clip a five-inch weft to the center back. I then add another five-inch wide weft over each ear. At this point it should look pretty full-on thick. You can secure these extensions with a few bobby pins placed just under the clips. The last piece is another five-inch extension on top of the center back weft.
Round out your style.
The trick to making it look like your real hair is to add shorter extensions to distract from your hair being two different lengths. Since I use extra-long extensions for this style, I chose a few 18-inch long, one-inch wide pieces to create that illusion. I usually do two of these on either side of my head, and then hide a couple along my hairline on either side. If I want extra fullness at the top of my head, I’ll make one more layer part and clip a three-inch wide 18-inch long weft to either side. It blends the shorter layers, and makes it look more realistic.
Pin, check, and go.
Brush out your finished weave and then brush your real hair up top. Gather your layer of real hair down and back. It should drape over and hide the top wefts. I like to secure my hair up in back with two bobby pins, but a pigtail or bun would also look nice depending on how long your hair is. You can also pin some of the extensions back for an even more realistic look. You’re ready to go now. Just don’t forget to check that none of your clips are showing—there’s nothing that annoys me more than that!
Good Molecules: See a difference in your skin
New Arrivals
-
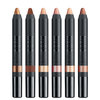
Nudestix Nude Beach 6-Piece Eye Pencil Palette
$69
-
Danessa Myricks Beauty ColorFix 24-Hour Cream Color Matte Sundaze
$20
-
Danessa Myricks Beauty ColorFix 24-Hour Cream Color Matte Oasis
$20
-

Danessa Myricks Beauty ColorFix 24-Hour Cream Color Matte Dreamsicle
$20
-
Danessa Myricks Beauty ColorFix 24-Hour Cream Color Matte Bunny
$20